

Aquascaping for Beginners: Hardscape, Layout, and the Rule of Thirds
Aquascaping turns a glass box into an underwater landscape, and a few simple design rules do most of the work. This guide covers choosing hardscape, using the rule of thirds, building depth, and the setup order that gives beginners a natural, balanced scape on the first try.

Quick answer

Aquascaping for Beginners: Hardscape, Layout, and the Rule of Thirds
Great aquascapes come from a few simple choices: pick one type of stone and one style of wood, place your focal point off-centre using the rule of thirds, and build depth with low plants in front and tall ones behind. Arrange all the hardscape dry before adding water or plants, and leave open space rather than filling every corner.
- Species
- fish, shrimp
- Category
- environment
- Risk level
- low
- Content focus
- practical owner decisions + mechanism
- When to escalate
- same-day if pain, not eating, breathing issues, or rapid decline
Decide in 60 seconds
| Situation | Do now |
|---|---|
| Mild / stable at home | Follow steps in this guide and monitor for 12–24 hours |
| Not eating, hiding, or clear pain | Same-day vet (species-savvy if exotic) |
| Breathing hard, collapse, continuous distress | Emergency vet now |
| You are unsure after reading | Call a clinic with your notes rather than waiting days |
Start with a style
Most beginner scapes follow one of a few looks. The nature style uses wood, stone and plants to evoke a landscape; the iwagumi style uses only carefully placed stones; a jungle style lets plants grow wild and full. Pick one and commit, because mixing styles is what makes a tank look cluttered rather than intentional.

Choosing hardscape
Hardscape, the wood and stone, is the skeleton of your scape. Choose one kind of each so the scene reads as a single place. Slope your substrate higher at the back to add depth and let water flow forward. Remember that some woods release tannins that tint the water tea-coloured for a while, and certain rocks raise hardness and pH, which matters for the fish and shrimp you plan to keep.
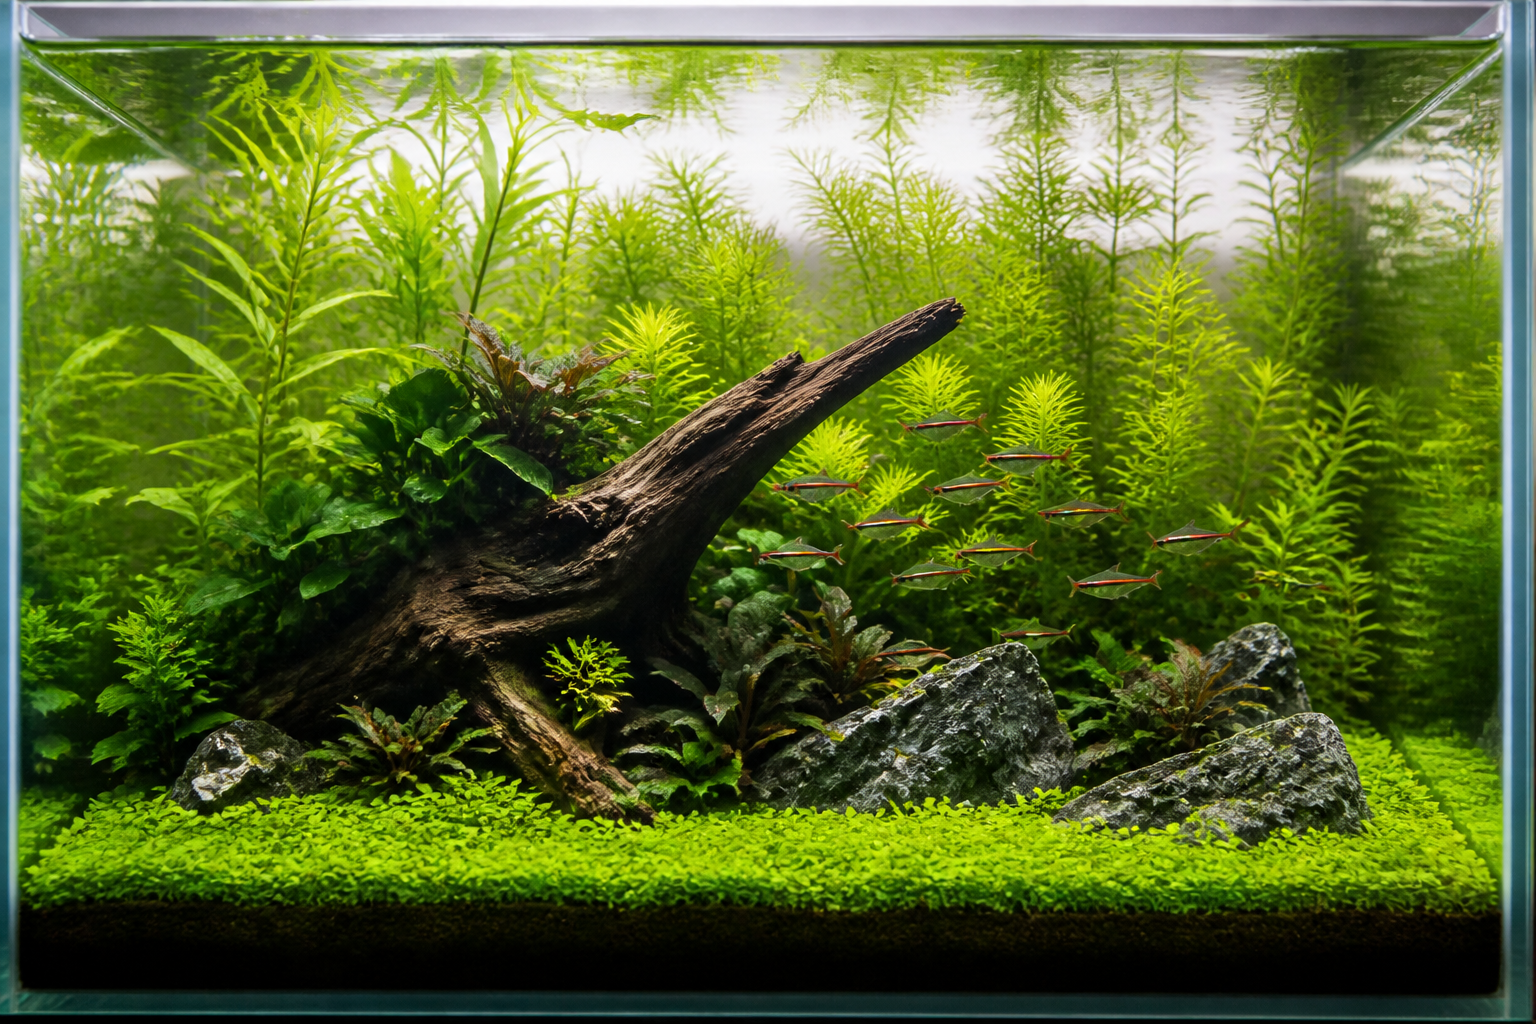
Set the hardscape dry first, placing the focal point off-centre.
The rule of thirds
Imagine your tank divided into thirds both ways, like a noughts-and-crosses grid. Placing your main feature, a tall piece of wood or the largest stone, on one of those lines rather than dead centre instantly looks more natural and dynamic. A centred focal point feels static and artificial, so let one side carry more visual weight than the other.
Building depth
A tank is shallow front to back, so depth is an illusion you create. Place the shortest plants and finest gravel at the front, medium plants in the midground, and the tallest stems or largest wood at the back. Finer textures and lighter colours in the distance push the background further away, exactly as they do in a landscape painting.
Low plants in front and tall ones behind create the illusion of depth.
The setup order
Work dry and in order for a clean result. Add and slope your substrate, arrange and adjust the hardscape until you are happy, then plant from background to foreground. Only then fill slowly, pouring onto a plate or bag to avoid disturbing your work. Rushing to add water before the hardscape is settled is the most common beginner regret.
Living context by region
This guide is written for multi-region English readers (US/UK/AU/NZ/CA/EU and more). Where climate, products, or vet access differ, prefer local veterinary advice and local product labels. Use metric first; keep °F/lb in mind for North American homes.
When to call your vet
-
Signs are getting worse over hours, not better
-
Pain, persistent vomiting/diarrhea, or neurological signs
-
You needed force or guesswork to keep going at home
Common mistakes
-
Waiting because the animal 'still looks okay' while prey species hide pain
-
Changing five variables at once so you cannot tell what helped
-
Copying drug doses from social media
-
Skipping species-appropriate husbandry while buying more gadgets
FAQ
Do I need expensive equipment to aquascape?
Why does my new driftwood float?
How many plants should I start with?
Should the focal point go in the middle?
My highlights & notes
This article is for general education and is not a substitute for professional veterinary advice. If your pet is unwell, please consult a veterinarian.
Worried about your pet?
Peqaboo’s AI helps you track symptoms, understand lab reports, and know when to see a vet.
Get the Peqaboo app